4. Space-flight
This guide is also available in video format. Click below to watch the video or scroll down for the written version.
Follow along the steps below in APEX.
1. General information
Fleet overview
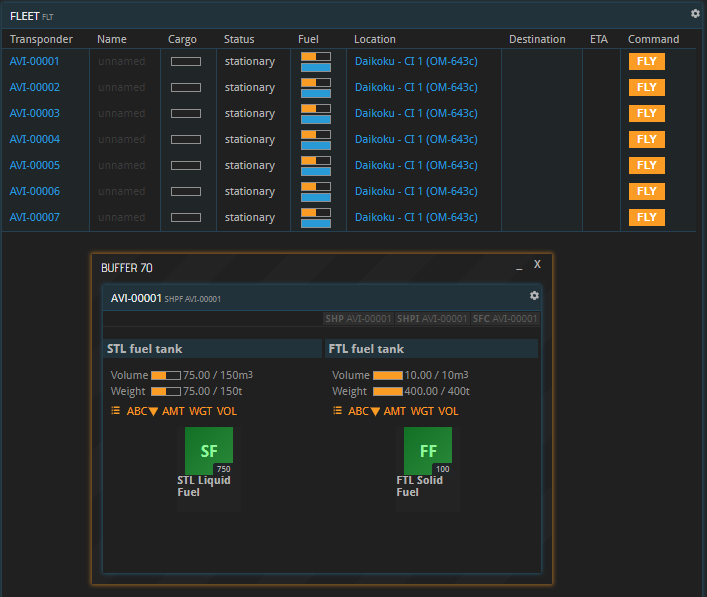
To access your ships, enter the fleet command, FLT, or click its shortcut in the left sidebar. In the new buffer, you can see details about each of your ships: its unique transponder code; its name; its cargo and fuel fill levels; its status (meaning if it’s currently moving around); its location; and, while it’s moving, its destination and Estimated Time of Arrival (ETA).
FTL vs. STL travel
There are two modes of travel: STL (slower than light) and FTL (faster than light). Note that these two need different kinds of fuel, as you can see when you click the fuel bars of one of your ships in the fleet overview:
Each of the dots on the Universe Map (command: MU NAV) represents a star and its planetary system. Going from one star to another means travelling a vast distance, which is only possible by FTL travel. The lines between systems represent the flight routes for FTL travel.
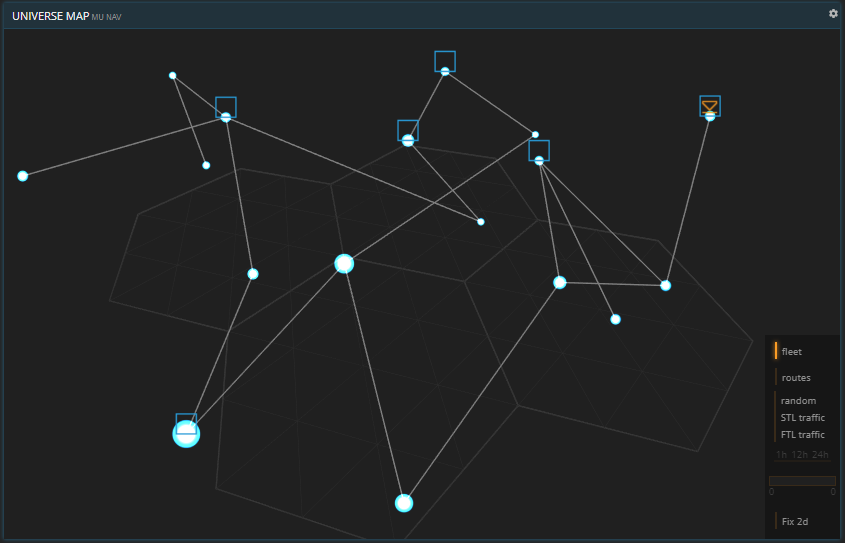
On the Universe map, you can toggle the display of different types of information on or off in the bottom right corner. Toggling FTL traffic on reveals triangular bars, which appear in all systems ships have jumped to FTL from, meaning that their destination systems and any systems on their way there aren’t accounted for. At the bottom, you can change the time window you want to be displayed, e.g. to only see traffic data from the past hour.
The bar at the bottom shows a gradient from brown to yellow. The number on the left is the smallest number of jumps performed in any system where a ship has jumped, and the number on the right is the highest number - again, within the designated time period. The color of the triangular bars corresponds to the gradient, and so does their height; the higher a bar, the more traffic the system has seen. The display of STL traffic works the same, showing systems in which ships have traveled below lightspeed.
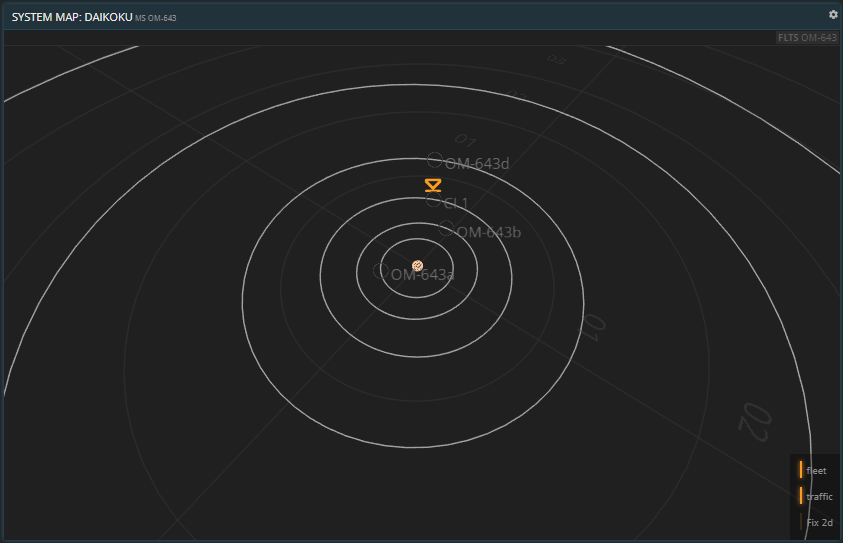
If you click a system on the Universe Map, you can see its star and the orbiting planets. Traveling within a system - between planets or space stations - is done at a much slower speed, which is where STL travel comes into play.
2. Moving ships
In the following example, the ship is on the planet Vallis and will be sent to the planet Montem in the same system. Distances within a system are short enough to be bridged by STL travel.
2.1 STL travel
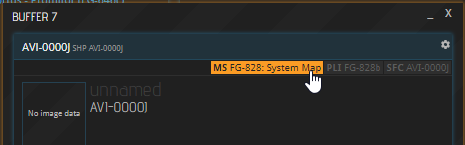
To prepare the next steps, select the ship you would like to move by clicking its transponder code in the FLT window. Open the System Map of its current system from the context menu at the top of the SHP buffer. You do not usually have to take this step, but it will help you understand how things work.
Entering a destination
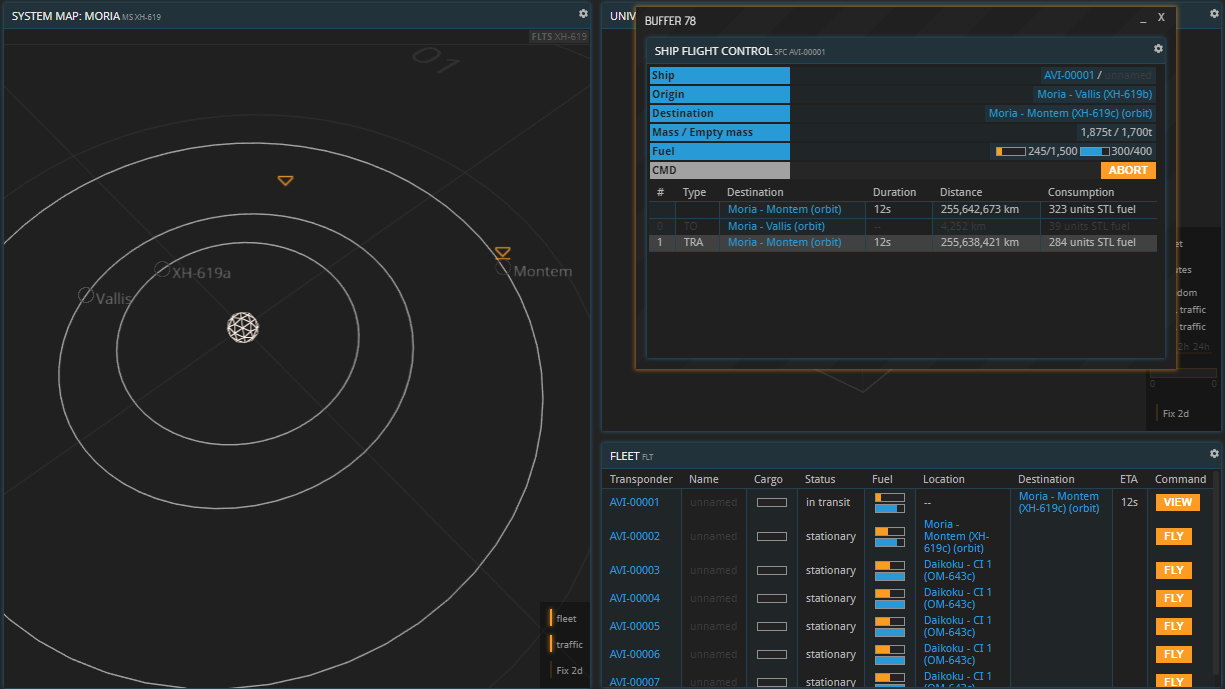
To send your ship on its way, first click FLY in its row in the Fleet buffer. In the SFC window that opened up, you need to enter a planet or station ID of the ship’s destination. For example, enter “Montem”, and the Ship Flight Control will find it. Once that happened, a preview of your flight route will appear in the respective System map you just opened. In the SFC buffer, a list of travel segments appears:

Please disregard the indicated travel times in this screenshot. It was taken in a severely sped-up simulation.
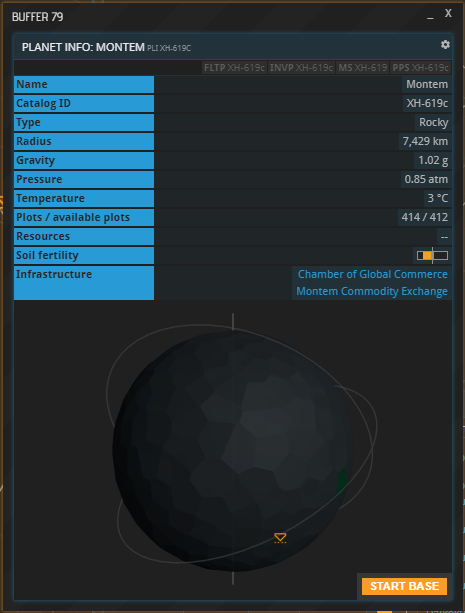
Many planets are currently unnamed, and you are going to need to enter their ID, which consists of the system ID followed by a letter representing the desired planet. Note that named planets also have an ID. In this example, the system Moria’s ID is XH-619. Opening Montem’s Planet buffer, we can see its ID is XH-619 - for Moria - followed by “c” for Montem itself.
Setting fuel usage
Now it is time to set the desired values in the SFC window. If your target is a planet, toggle “Surface landing” on or off depending on what you would like to do. In order to deliver or pick up wares on a commodity exchange on a planet, your ship needs to land. If it does not land, it will be displayed in orbit like this upon arrival:
The next thing you can set is the desired fuel usage. The higher you set this, the sooner your ship will arrive. You can order your pilot to do a hard and fast burn towards the target, then flip and do another hard burn in the opposite direction to slow down. However, this is a very costly way of going places. It might even happen that you do not have enough fuel for such a maneuver. In that case, the Ship Flight Control will let you know and the flight cannot be started.
Setting the fuel usage to a lower value means that your ship will be doing a lot less accelerating, which results in longer travel times. If you set the slider to a low value and the system does not accept it, you have selected a value below the minimum fuel required for the selected journey. In this case, you need to set the fuel usage to a higher value. Note that if the slider does not go all the way up to 100 %, that is because the distance is too short for your ship’s engine to burn up all of the available fuel. The longer the transit and the stronger the engine, the higher this value can go up.
By moving the slider around, you can not only see exactly how many units of fuel your ship is going to need, but also the exact travel distance. It changes around because the relative positions of the planets change as they orbit around their star, and the slower your ship travels, the more they will move between its departure and arrival. This is oftentimes negligible, however if you really want to save fuel and you do not care when the flight takes place, you can wait for the closest approach of two planets before you send your ship on its way.
Order your flight by hitting “START” in the Ship Flight Control. You can now see in the fleet window that the ship’s location has changed to “in transit”, and a destination and Estimated Time of Arrival are being displayed. The ship’s flight can be reverted by hitting “ABORT” in the Fleet window. When the ship arrives, the Notification signal in the upper right corner lights up to let you know that the transit was completed successfully.
2.2 FTL travel
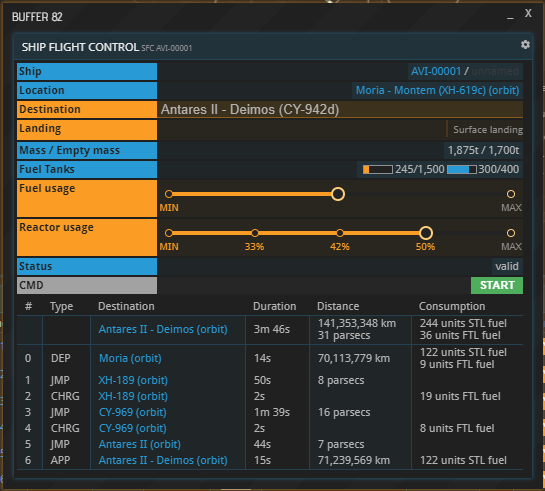
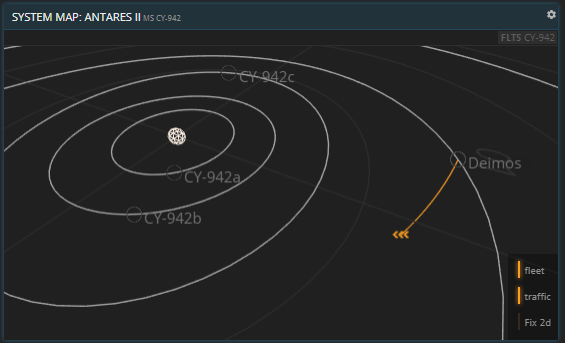
What if your target planet or station is orbiting a different star? To travel between systems, your ship needs to jump to FTL. Open up the Universe map (command: MU NAV) and pick a destination planet or station in another system. In this example, the destination planet is Deimos, or CY-942d.
Like with STL travel, you first need to open up the Ship Flight Control by hitting “FLY”. When entering a planet ID from a different system, a few more lines pop up than before. Besides switching between orbit and planet surface and selecting the STL fuel usage, you can now also set the Reactor usage of your FTL drive.
You might wonder why STL fuel is also required. In the past, there have been a few instances of ships jumping to FTL while still close to a celestial body. Because this is highly dangerous and has resulted in mass casualties more than once, it is now required by law that every ship move far enough away from its starting planet before performing an FTL jump.
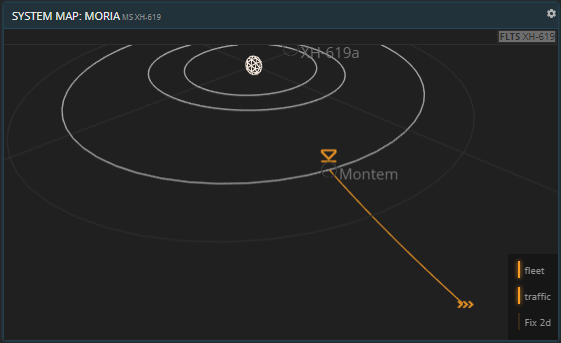
Once a destination has been entered in the SFC buffer, the System Map shows a preview of the ship’s STL flight path and the exact point where its FTL engine takes over. This bit is called “departure”.
The same provisions are in place for the “approach” section of an FTL flight. Since dropping out of FTL in the vicinity of a celestial body is also prohibited, the ship will leave FTL in a safe distance to the target planet within the target system and then utilize its STL drive to close the gap. Note that departure and approach segments taking place before and after an FTL jump do not count towards the STL traffic data displayed in the Universe Map.
Now set the values for your flight. Switching between the surface and orbit as well as adjusting the FTL fuel usage works just as before. Changing the Reactor usage impacts how much FTL fuel is going to be used up and how long the trip is going to be. At the bottom, you can see the exact segments of your flight. The abbreviations on the left indicate the type of each segment: DEP (departure), JMP (jump), CHRG (charge), and APP (approach).
If the target system is not directly adjacent to your ship’s current system, you might be wondering why your ship passes through several other systems on its way. FTL drives, while capable of speeds faster than light, do not allow for instantaneous jumps from one place to another. Instead, they travel from star to star (displayed as dots on the Universe map) using FTL routes (displayed as lines).
Once you send your ship on the way, its status in the FLT window will change from “stationary” to “departing”. When it reaches its jump point, you can see the ship’s position on the Universe Map. Every time the ship reaches a system, it will drop out of FTL for a short while and recharge its FTL for the next jump. During that period, its status in the Fleet window changes to “charging”. Once the ship has arrived at the target system, its status changes to “approaching”, and as soon as it reaches its destination planet, you will get a Notification in the top right corner, just like before.

2.3 Refueling
In the Fleet window, you can see each of your ships’ current fill level of STL fuel - the orange bar - and FTL fuel - the blue bar. Click the bars to get a closer look of your fuel tanks. How much fuel they can carry is limited by the weight and volume the respective type of fuel takes up. In this respect, they work exactly like resources in a planetary inventory.
Keep in mind that, when planning a flight, you possibly need to account for the return flight as well. If your ship ends up empty on a planet with no Commodity Exchange, it is stranded there until it gets refueled. This is done by dragging and dropping the desired fuel into its fuel tank from a source in the same place, which can be a base’s inventory, the ship’s own cargo hold, or another ship’s cargo hold.
Please note that two ships orbiting the same planet do not count as “in one place”, and neither do ships orbiting the same star. Ships need to be landed on the same planet or station in order to refuel each other.
To practice your newly acquired skills, feel free to set up some flight paths to preview them without actually sending your ships on the way, and you will get the hang of it quickly.
2.4 Aborting flights
If you already sent a ship on its way and changed your mind about it, you can abort the flight in the ship’s Flight Control window.

The following rules apply to aborting flights:
- The flight is not immediately aborted. The current segment (DEP, JMP etc.) will be completed.
- If the flight is aborted during the CHRG segment, the ship will also have to finish the ensuing jump to release its energy.
- If the flight is aborted during a jump, the ship will arrive at a random orbit in its current target system.
- Fuel is deducted per segment, at the beginning of each segment.
About this page
This page is part of the advanced tutorial series. Use the arrows on the sides to cycle through all available tutorials in order, from introductory to more and more specific topics.
If you encounter an error or cannot find the answers to your questions, we will gladly help you on our Discord server.